iOS自动布局
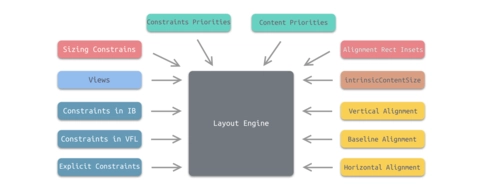
iOS 自动布局(Auto Layout)是Apple在iOS 6及以后版本引入的一种动态布局系统,用于处理用户界面元素在不同屏幕尺寸和方向下的自适应布局。通过自动布局,开发者可以创建灵活的、可伸缩的UI设计,确保应用在各种iPhone、iPad设备以及不同的屏幕旋转状态下都能保持良好的视觉效果和用户体验。
以下是iOS自动布局的主要特点和使用方法:
约束(Constraints):自动布局的核心是约束,它定义了视图间的关系(如距离、对齐、宽高比等)。开发者可以通过代码或Interface Builder为每个视图添加一组约束来指定其相对于父视图或其他视图的位置和大小。
可视化格式语言(Visual Format Language, VFL):一种简洁的字符串语法,用于快速描述复杂布局关系。
NSLayoutAnchor和NSLayoutConstraint:在Swift中,苹果推荐使用NSLayoutAnchor类及其子类(如UIView的leadingAnchor、topAnchor等)来更安全且方便地创建约束。
优先级(Priority):约束具有优先级设置,允许开发者定义哪些约束必须满足,哪些可以在空间不足时适当调整。
更新约束(Update Constraints):当需要动态改变布局时,可以通过更新现有约束或者添加/删除约束来响应内容的变化或设备状态变化。
UIScrollView 和 Auto Layout 结合:从iOS 11开始,UIScrollView新增了一个
contentLayoutGuide属性,使得在滚动视图内使用自动布局更加容易,能够正确管理内容视图与滚动区域的关系。Stack Views(堆栈视图):自iOS 9起,UIStackView作为自动布局的辅助工具被引入,它可以管理和排列一组子视图,并根据约束自动调整它们的位置和大小。
通过合理运用自动布局,开发者可以避免手动计算和硬编码坐标,使应用程序更容易维护和适配未来的设备屏幕变化。
实例步骤
1.创建一个简单的 View based application
2.修改 ViewController.m 的文件内容,如下所示
#import "ViewController.h"
@interface ViewController ()
@property (nonatomic, strong) UIButton *leftButton;
@property (nonatomic, strong) UIButton *rightButton;
@property (nonatomic, strong) UITextField *textfield;

@end
@implementation ViewController

- (void)viewDidLoad{
    [super viewDidLoad];
    UIView *superview = self.view;
    /*1. Create leftButton and add to our view*/
    self.leftButton = [UIButton buttonWithType:UIButtonTypeRoundedRect];
    self.leftButton.translatesAutoresizingMaskIntoConstraints = NO;
    [self.leftButton setTitle:@"LeftButton" forState:UIControlStateNormal];
    [self.view addSubview:self.leftButton];
    /* 2. Constraint to position LeftButton's X*/
    NSLayoutConstraint *leftButtonXConstraint = [NSLayoutConstraint
    constraintWithItem:self.leftButton attribute:NSLayoutAttributeCenterX
    relatedBy:NSLayoutRelationGreaterThanOrEqual toItem:superview attribute:
    NSLayoutAttributeCenterX multiplier:1.0 constant:-60.0f];
    /* 3. Constraint to position LeftButton's Y*/
    NSLayoutConstraint *leftButtonYConstraint = [NSLayoutConstraint
    constraintWithItem:self.leftButton attribute:NSLayoutAttributeCenterY
    relatedBy:NSLayoutRelationEqual toItem:superview attribute:
    NSLayoutAttributeCenterY multiplier:1.0f constant:0.0f];
    /* 4. Add the constraints to button's superview*/
    [superview addConstraints:@[ leftButtonXConstraint,
    leftButtonYConstraint]];
    /*5. Create rightButton and add to our view*/
    self.rightButton = [UIButton buttonWithType:UIButtonTypeRoundedRect];
    self.rightButton.translatesAutoresizingMaskIntoConstraints = NO;
    [self.rightButton setTitle:@"RightButton" forState:UIControlStateNormal];
    [self.view addSubview:self.rightButton];
    /*6. Constraint to position RightButton's X*/
    NSLayoutConstraint *rightButtonXConstraint = [NSLayoutConstraint
    constraintWithItem:self.rightButton attribute:NSLayoutAttributeCenterX
    relatedBy:NSLayoutRelationGreaterThanOrEqual toItem:superview attribute:
    NSLayoutAttributeCenterX multiplier:1.0 constant:60.0f];
    /*7. Constraint to position RightButton's Y*/
    rightButtonXConstraint.priority = UILayoutPriorityDefaultHigh;
    NSLayoutConstraint *centerYMyConstraint = [NSLayoutConstraint
    constraintWithItem:self.rightButton attribute:NSLayoutAttributeCenterY
    relatedBy:NSLayoutRelationGreaterThanOrEqual toItem:superview attribute:
    NSLayoutAttributeCenterY multiplier:1.0f constant:0.0f];
    [superview addConstraints:@[centerYMyConstraint,
    rightButtonXConstraint]];
   //8. Add Text field
    self.textfield = [[UITextField alloc]initWithFrame:
    CGRectMake(0, 100, 100, 30)];
    self.textfield.border = UITextBorderRoundedRect;
    self.textfield.translatesAutoresizingMaskIntoConstraints = NO;
    [self.view addSubview:self.textfield];
    //9. Text field Constraints
    NSLayoutConstraint *textFieldTopConstraint = [NSLayoutConstraint
    constraintWithItem:self.textfield attribute:NSLayoutAttributeTop
    relatedBy:NSLayoutRelationGreaterThanOrEqual toItem:superview
    attribute:NSLayoutAttributeTop multiplier:1.0 constant:60.0f];
    NSLayoutConstraint *textFieldBottomConstraint = [NSLayoutConstraint
    constraintWithItem:self.textfield attribute:NSLayoutAttributeTop
    relatedBy:NSLayoutRelationGreaterThanOrEqual toItem:self.rightButton
    attribute:NSLayoutAttributeTop multiplier:0.8 constant:-60.0f];
    NSLayoutConstraint *textFieldLeftConstraint = [NSLayoutConstraint
    constraintWithItem:self.textfield attribute:NSLayoutAttributeLeft
    relatedBy:NSLayoutRelationEqual toItem:superview attribute:
    NSLayoutAttributeLeft multiplier:1.0 constant:30.0f];
    NSLayoutConstraint *textFieldRightConstraint = [NSLayoutConstraint
    constraintWithItem:self.textfield attribute:NSLayoutAttributeRight
    relatedBy:NSLayoutRelationEqual toItem:superview attribute:
    NSLayoutAttributeRight multiplier:1.0 constant:-30.0f];
    [superview addConstraints:@[textFieldBottomConstraint ,
    textFieldLeftConstraint, textFieldRightConstraint,
    textFieldTopConstraint]];
}
- (void)didReceiveMemoryWarning
{
    [super didReceiveMemoryWarning];
    // Dispose of any resources that can be recreated.
}
@end
原文链接: https://www.yukx.com/bingningm/article/details/720.html 优科学习网iOS自动布局
-
 ReactNative开发工具涵盖了从代码编辑器、集成开发环境(IDE)、调试工具到特定功能库和辅助服务的广泛范围。以下是部分关键工具,旨在提升ReactNative开发效率、调试体验和应用性能:代码编辑器与IDEVisualStudioCode (VSCode):流行的开源代码编辑器,具有强大的插
 -
 ReactNative是一个开源的跨平台移动应用开发框架,由Facebook在2015年4月首次推出。其核心理念是使用一套统一的JavaScript代码库,结合React(一个用于构建用户界面的声明式、高效且灵活的JavaScript库)的编程模型,来构建原生移动应用程序,同时支持iOS和Andro
 -
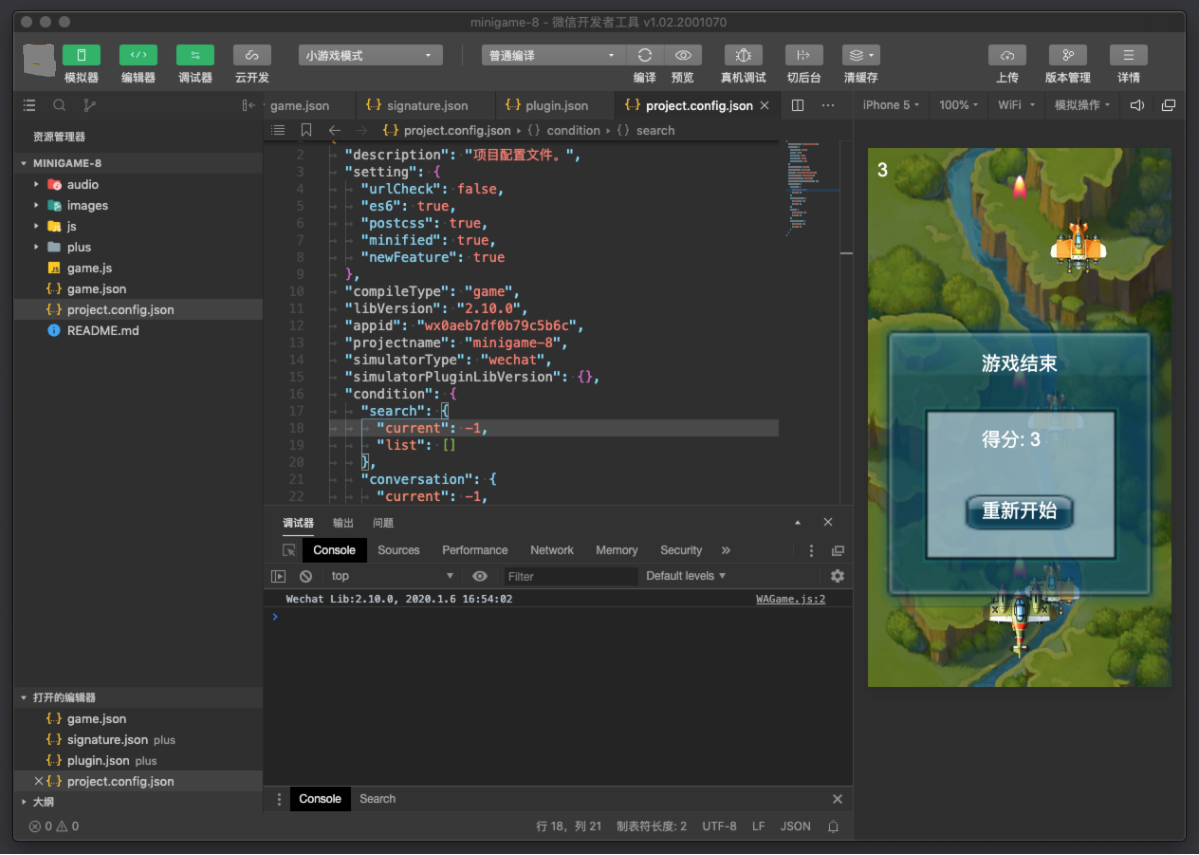 微信小程序的开发工具主要包括以下几类:微信开发者工具:官方工具:这是微信官方提供的核心开发工具,是开发微信小程序的首选和必备工具。它集成了代码编辑、调试、预览、发布等功能,支持实时预览效果、模拟器测试、性能分析、远程调试等,帮助开发者高效地完成小程序的编写、测试与发布流程。官方开发者工具通常会保持与
 -
 小程序简介微信小程序(英文名:WeChatMiniProgram)是由腾讯公司推出的基于微信平台的应用形态。它是一种无需用户下载安装即可使用的轻型应用程序,用户可以通过扫描二维码、搜索关键词或者在微信内通过特定入口(如发现页的小程序列表、公众号关联小程序等)直接访问。小程序以其“触手可及,用完即走”
 -
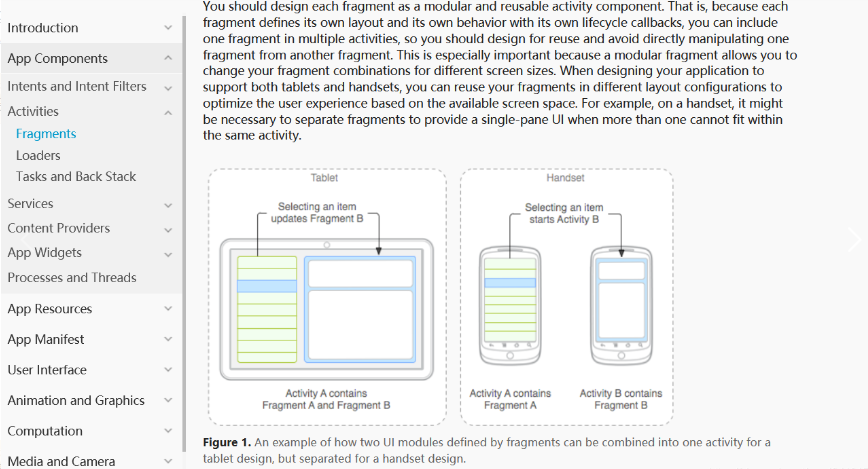 Android碎片(Fragment)是Android应用程序架构中的一个重要组件,旨在支持构建适应不同屏幕尺寸和形态的应用界面。以下是关于Fragment的详细说明:概念与作用定义与性质:Fragment 是一个可以嵌入在 Activity 内部的、具有独立用户界面和生命周期的模块化组件,继承自
 -
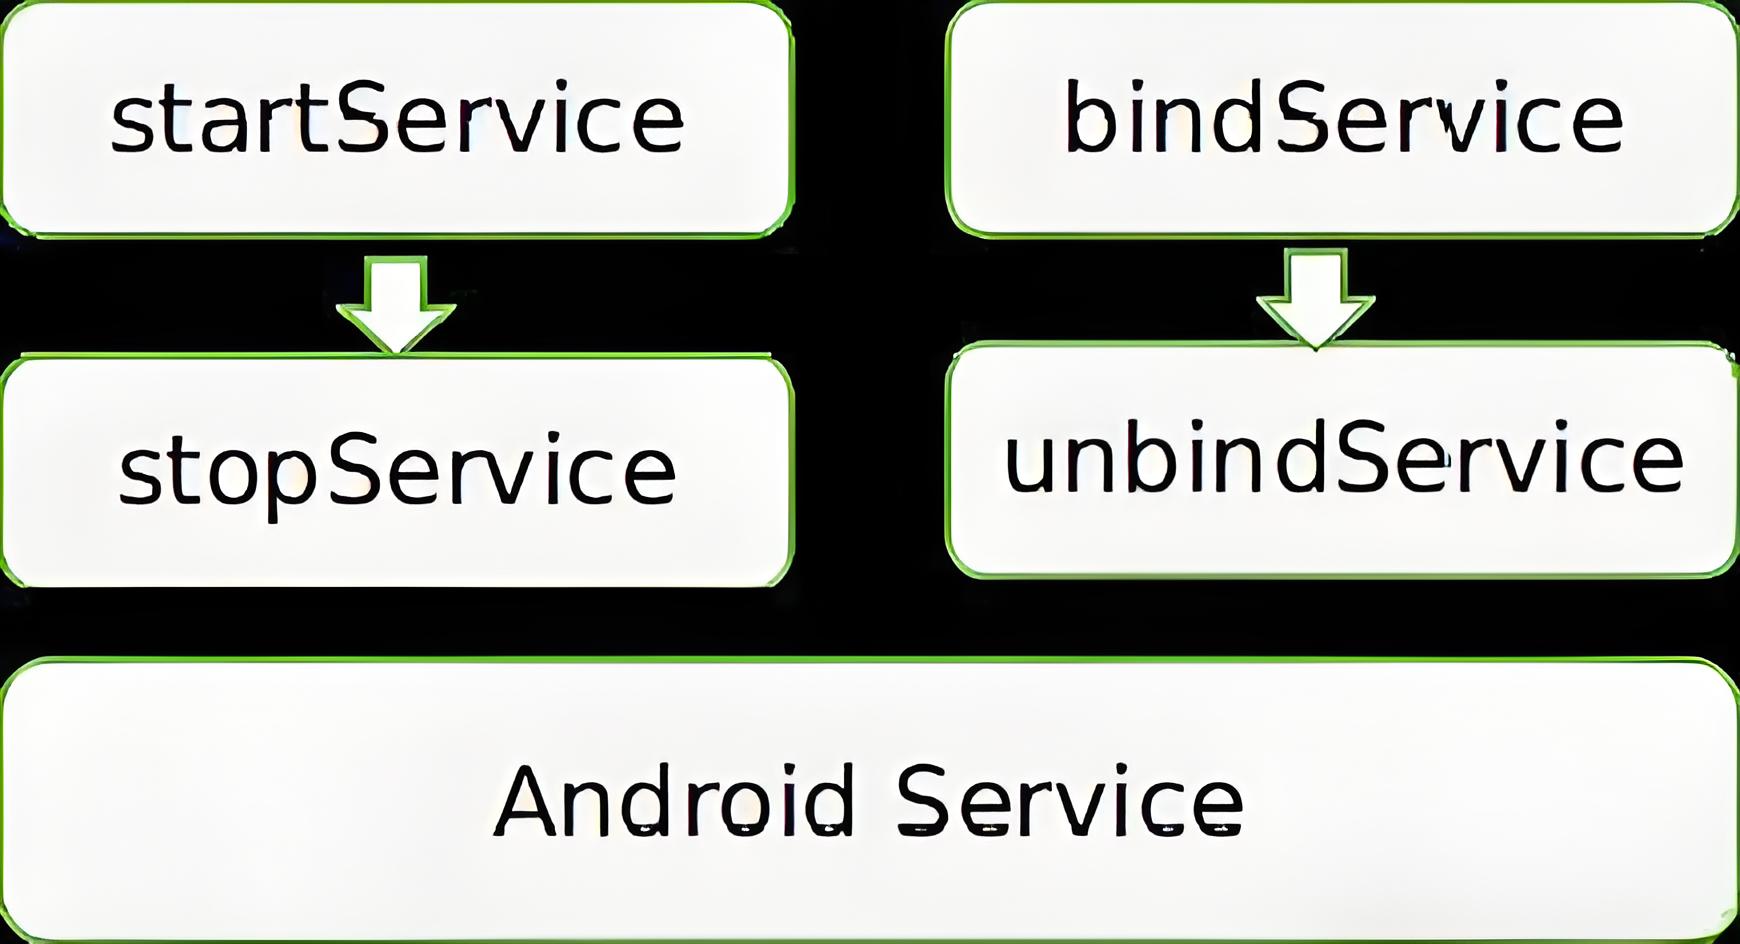 Android服务(Service)Android服务(Service)是Android应用程序架构中的四大组件之一,它专为在后台执行长时运行任务而设计,无需与用户直接交互或显示界面。以下是关于Android服务的详细说明:概念与作用定义与性质:Service 是一个应用程序组件,继承自 andro

